Who knew our childhood obsession with plastic animals could come in so handy?! According to our mother, the Early Learning Centre was our favourite shop; we would waddle up to the window and oggle the selection pointing at which we would like to join our ever-growing collection.
Fast-forward 20 years and we are wishing our collection was still alive and kicking, because oh boy what an amazing array of place card holders we would have!
We're sure you'll have seen these mystical creatures all over Pinterest, posing as place card holders, table name holders and nifty little jar lids and can imagine many of you DIY savvy brides and grooms may want to have a go yourselves. (Although, if you're not feeling up to the DIY challenge we'll be adding them to our Wedding Toolbox soon!) So, without further ado, here's how we went about creating these champagne gold woodland place card holders!
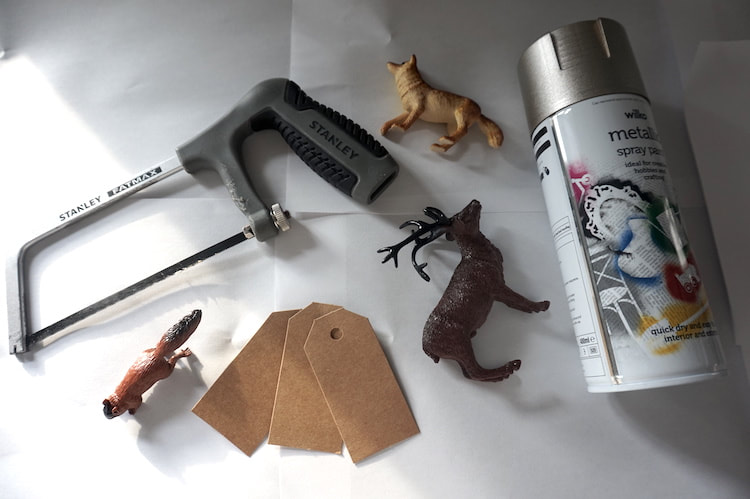
You'll need:
- A selection of funky woodland animals - ours were from Amazon
- A well ventilated workshop, or a space in the garden covered with paper to protect the ground (we now have a nice champagne gold patch of tarmac in the drive!)
- A jewellery saw or similar
- A spray paint of your choice, suitable for plastic - we used Wilko's Champagne Gold
- Standard kraft luggage tags
- A heavy duty nail file
- Standard paper towel
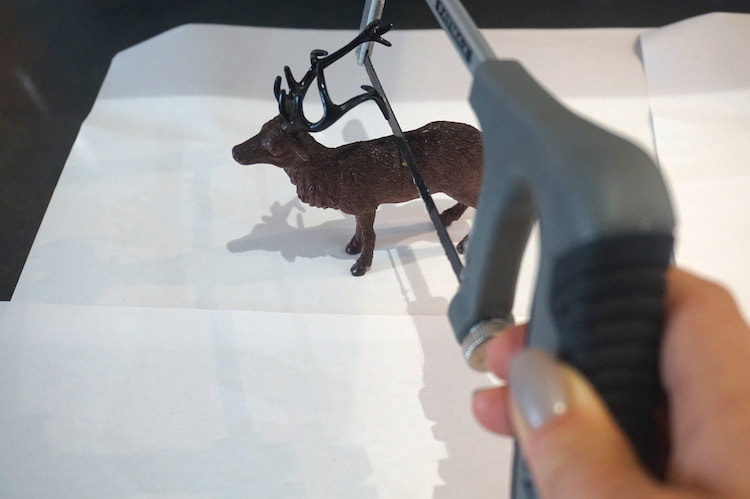
1. Using a saw, slice through the top of the plastic animal (ouch!) straight down, about half way down the body. Saw far down enough that your place card will stand up right and sturdy, but not so far that it covers part of the name. Be careful not to cut in at an angle as your card may tilt forward and be difficult to read.
2. File any jagged edges using a heavy duty nail file or very light sand paper. Using some damp paper towel, wipe away any dust or lumps of plastic. Ensure thoroughly dry before spraying!
3. Complete the above steps for all of your animals so that they're ready for their glitter!
2. File any jagged edges using a heavy duty nail file or very light sand paper. Using some damp paper towel, wipe away any dust or lumps of plastic. Ensure thoroughly dry before spraying!
3. Complete the above steps for all of your animals so that they're ready for their glitter!
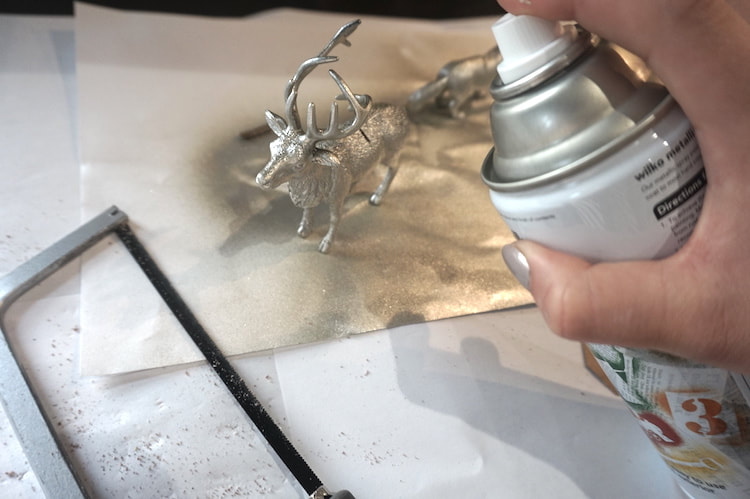
4. Outside, lay your animals on their side on newspaper and spray the first side with your chosen metallic spray paint. For the best coverage use short, sharp sprays at a distance to ensure not to spray too much paint as this will lose the all important detailing!
5. After 5-10 minutes, flip your animals onto the other side and spray again. Again leaving 5-10 minutes, stand the animals upright and finish the tops using the same short, sharp sprays.
5. After 5-10 minutes, flip your animals onto the other side and spray again. Again leaving 5-10 minutes, stand the animals upright and finish the tops using the same short, sharp sprays.
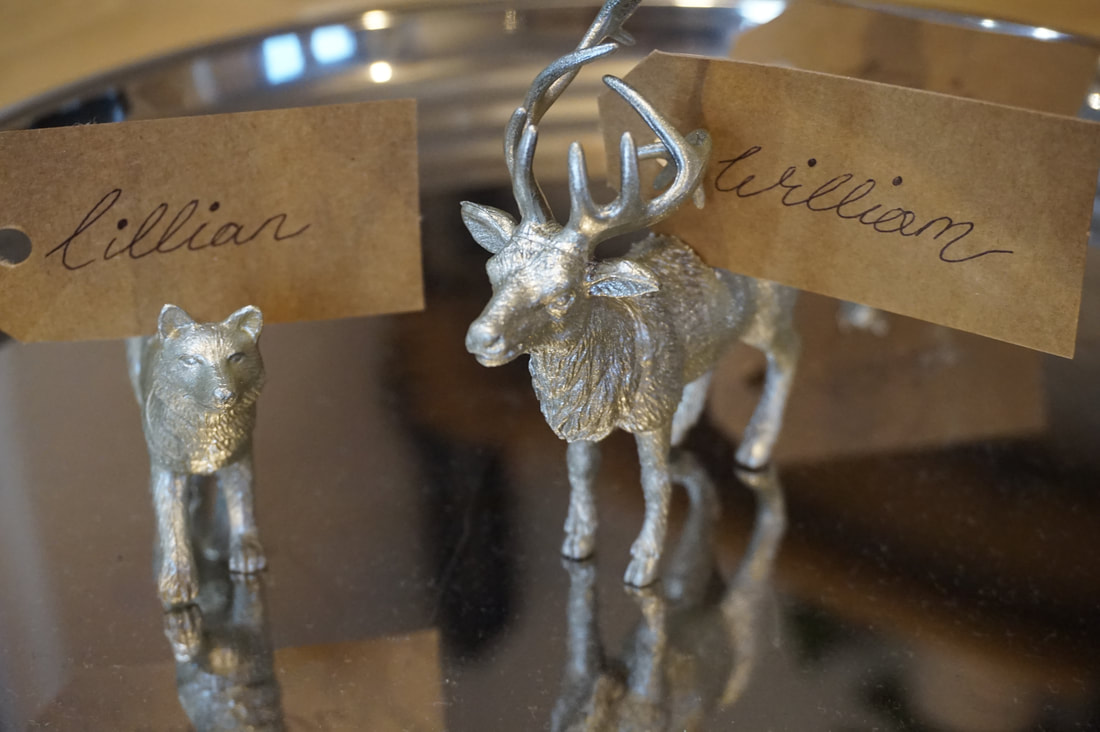
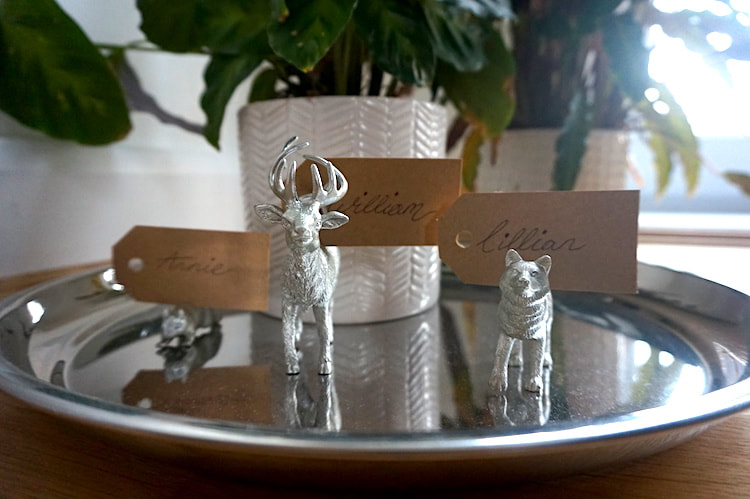
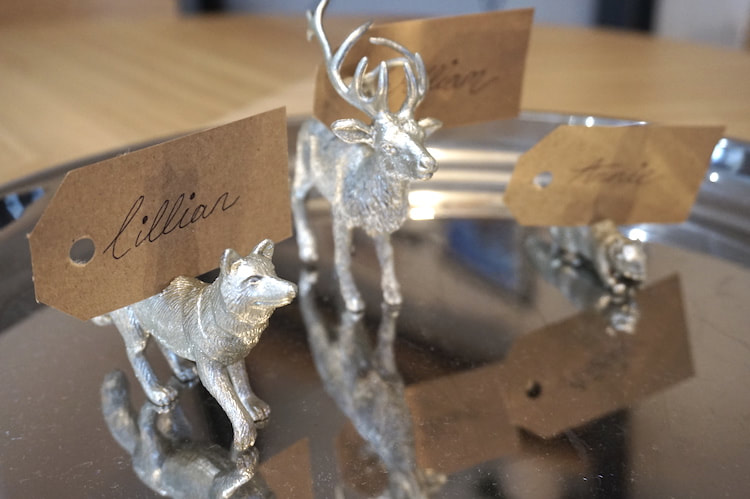
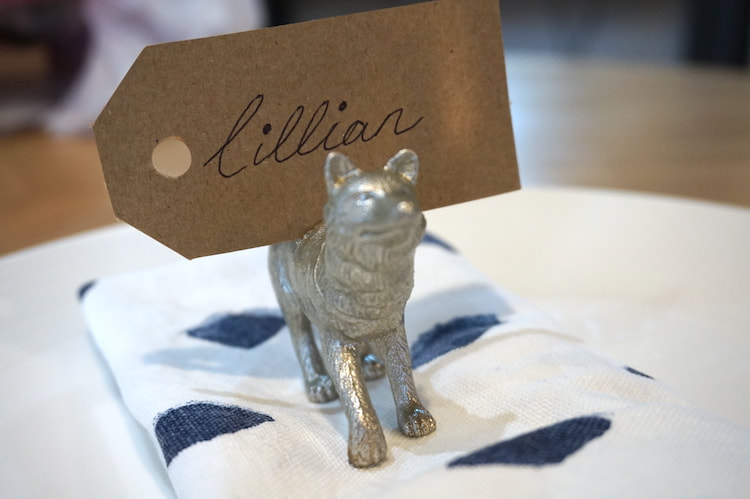
6. Wait for your animals to completely dry before slipping your place cards in. Here, we’ve used simple luggage tags with biro. If your handwriting is unfortunately child like your chosen Stationery Guru could create your name tags, or you could opt for an alphabet stamp set for a rustic feel.
TIP: Always have a spare plastic animal and place card handy to test during. You might need to deepen your slice into a ‘V’ shape, if you have particularly thick and heavy cards.
TIP: Always have a spare plastic animal and place card handy to test during. You might need to deepen your slice into a ‘V’ shape, if you have particularly thick and heavy cards.